
Before you start:
Decide if your event is a “one-off” or it happens regularly (same time every week/month, etc).
If it really recurs regularly, tick the box: “This is a recurring event.” If it’s a “one-off” just fill in the form with the date.
There is only one place to add an event (see below). Each event will all appear on every date in the calendar on which they actually occur. If an event is repeated on the same day every week, or every month, you can select ‘This is a recurring event‘, and so the one event you are currently adding will be automatically copied into the appropriate future dates for you. If you want to exclude one date because you can’t do it on that day, you can later go to that event and edit it again, to remove it (or just change some of the details, instead).
Finally – if you look at any event, you will see that there is a link to the Leader(s) of that event, where visitors can read all about them (you!).
————————————————–
Adding an Event
Log in, and choose ‘Add Event’ from the Leaders Guild Resources page, then use the ‘ADD NEW’ button on the right. Here are some notes about best practices while filling in the event details:
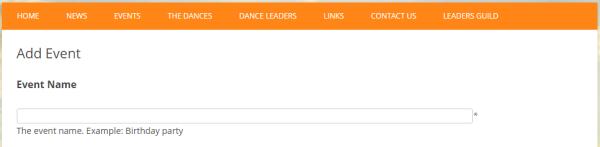
Event Name:
What to call your event? If you look at other events already posted on the Events Calendar, you will see what sort of name seems to work best in that sort of display. Look also at the list of events, underneath the calendar, where more information is displayed for each event, so that it makes a short title a little clearer (dates, time and location are included). Often, the place where it happens is most helpful, such as ‘Birmingham’ (if your event is the only one usually happening in Birmingham) though some events are better known by an established name, such as ‘Sacred Arts Camp’. Occasionally it might help to include the date(s), or the Leader’s name, if it’s a visitor from overseas, for example.
Just bear in mind the space on the Calendar is very small!!
So –
- Keep the title short (2 or 3 words)
- Include the place name at the beginning of the title
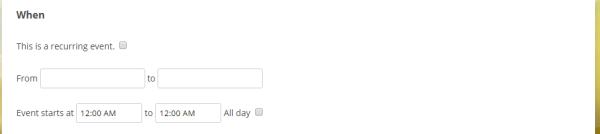 When:
When:
Use the calendar tool to select the date, or range of dates.
IF IT IS A RECURRING EVENT:
If your event truly does happen regularly, say every Wednesday evening, or every second Saturday, then tick the box for ‘Recurring Event’ and just fill in the description for the first upcoming date. Then you can specify how it repeats (weekly, monthly, etc). You will need to specify a start and end date, so it will expire on the end date you select. A suggestion would be to set it up for the next year – but remember to extend it in a years time, or it will stop displaying your event! You can always add detail to a particular event in the series by editing it separately when the date is approaching – use the link on the left of the event entry, not the ‘Edit recurring event’ link on the right.
If you cannot guarantee that your event will repeat exactly regularly, DON’T USE THE ‘RECURRING EVENT’ feature.
Instead, Create the first event as a single event, save it, then go back to ‘Add Event’, find the event on your list of upcoming (or past) events and click the little +/- symbol to ‘Duplicate’ that event. The event opens as before, and all you do is change the date to the next date when you will hold the same event, and press ‘Submit’. Repeat this for all future dates that you are sure of.
IF your event does repeat regularly (usually) but YOU WILL NOT HAVE AN EVENT ON ONE OF THOSE DAYS, you can edit any particular date within a recurring event sequence and thus remove it from the regular sequence which was automatically created.
This also applies if you want to add little differences in detail for some particular dates.
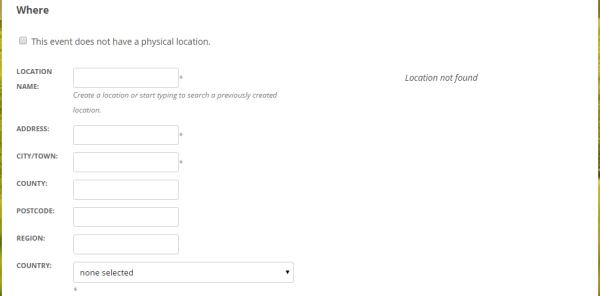 Where:
(Ignore the tick box that says ‘This event does not have a physical location’).
When starting to add the Location, first please check if the location is already in the system. If it is, you can call it up by typing in the first 3 or 4 letters of the Location name and it will suggest the full name under the box – click on that and the whole set of location details will be automatically filled in for you. This avoids duplicating the same location.
If your location does not already exist, continue filling in the form: try to keep to the pattern already set by the existing Locations: It is best to start with the name of the town, or the place most often associated with that event, then possibly the name of the building, etc. This makes it easier for people to search the list alphabetically.
All boxes fairly self-explanatory, but ignore the ‘Region’ box, and if you search the ‘Country’ drop-down list carefully you will find England, Scotland and Wales – you don’t have to use ‘United Kingdom’.
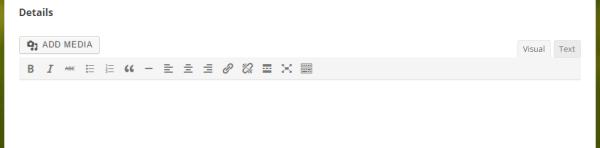 Details: (here you have an editing box, with a choice of two views: ‘Visual’ and ‘Text’. Note also the very useful icon at the right-hand end of the set of icons in the toolbar, which has the title ‘Toolbar Toggle’, if you hover your mouse over it. Click that to turn on extra tools.)
This is where it would be helpful to include some obvious items which the designers of this Calendar plugin didn’t think to include, so as well as all the info that you want to tell people about how wonderful the event will be, please consider including, at the end:
Contact: (contact person’s name)
Phone: (contact person’s phone number)
Email: (contact person’s email address) ** If you enter this while viewing the ‘Visual’ tab, rather than the ‘Text’ tab (see the top right hand corner of the details entry box), highlight the email address, then click the ‘link’ icon in the toolbar – a dialogue box should open, and the correct code and email address should be already showing in blue in the box. Just click the blue ‘Add Link’ button. The email address will automatically be created as a working link.
Website: (if there is one related to yourself, or the venue, and it would help people know more about the event.) To add a website link, you need to highlight the website URL, and copy it to the clipboard, then click the ‘link’ icon in the toolbar and paste the URL in. It will automatically format it correctly with the addition of ‘http://’ in front.
A general note about using the ‘Visual’ and ‘Text’ tabs:
Some leaders like to include HTML in their entries. Sometimes this is done by copying and pasting some already-formatted text from another website. It’s OK to do this if you really understand how it works! Otherwise, please stick to entering plain text, by typing straight into the box. If you use the ‘Visual’ tab, you have tools which help you with text styles, bold, italics, etc.
Please keep any “special effects” (huge lettering, bright colours, capital letters, etc) to a minimum, so that the general style of the website is kept consistent.
Next, underneath the details editing box:
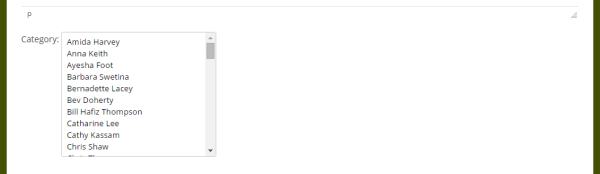 Category:
Here there is a drop-down box, where you select the name of the leader(s) of the event. If there are more than one, hold down the ‘Control’ (ctrl) key while you click on the second or third names, to select more than one at a time.
 Event image:
If you have a picture which will add vital extra information (one of the venue, for example), please upload it. It will be displayed at the top of your event page, and must be no bigger than 620 pixels wide, so if you can make your image that wide or smaller, it will avoid it taking ages to process the image file. (You may need to use an image editing program, like Photoshop, to reduce a large photo to be 620 pixels wide or less.)
Event Type:
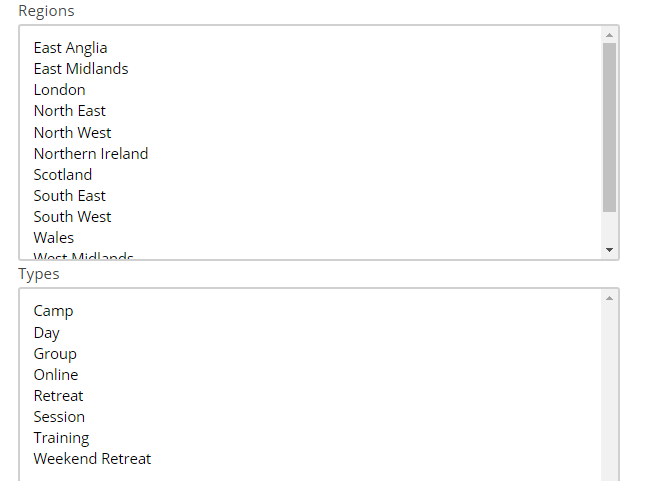
There are two dropdown menus underneath the information of your event where you can select Region, and Event Type – this is to facilitate anyone looking for events in a particular place (such as close to where they live) or a particular type of event (someone looking for a retreat probably doesn’t want a weekly group).
Then just click the ‘Submit Event‘ button!
—————————————-
Remember – if you hold a similar event again, at the same location, you can quickly duplicate the event, saving a lot of time.